Thinking about getting your eyebrows tinted? Have you ever colored them before? If not, you will learn a lot about this process, its pros, as well as how easy it is to do it at home and on your own. You can transform your brows in less than 15 minutes and there are only a few key products you will need, as well as a bit of confidence! Keep on reading to see how to tint eyebrows.
Related Posts


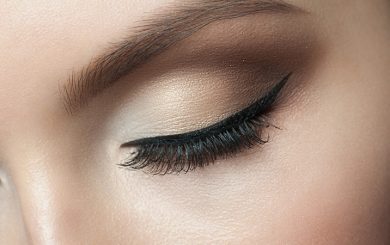
What Is Eyebrow Tinting?
This is a semi-permanent makeup solution that changes the natural color of your brow hairs, or it can change the previous dye that you have had. The tint gives your brows a darker and stronger hue and will give you a thick and fluffy looking brow. The process takes two to five minutes, but this depends on your hair type as well as your skin type. When done correctly, your tint will stay visible and noticeable during the next two to three weeks. The more you expose the tint to the sun, sweat, water and humidity, the faster it wears off. However, our eyebrows have their own natural shedding cycle which you cannot reverse or slow down. Be aware of this before committing to the brow tint.
What to Keep in Mind About Eyebrow Tinting
As long as you are not allergic to your brow dye and your skin is not super sensitive you can get your brows tinted. Some technicians recommend doing a patch test 24 hours before the treatment, just so you can fully determine whether you are or not allergic.
The Purpose of Brow Tinting
You may be wondering why eyebrow tinting has become such a popular cosmetic trend. Well, the truth is, people tint their eyebrows for many reasons, including:
- To darken eyebrows
- To lighten eyebrows
- They want to match their eyebrow color to their hair color
- They want to make their brows seem thicker
Eyebrow Tinting Preparation
It is always important to start any beauty treatments makeup-free. Make sure your brows have been cleansed beforehand. If you are doing this treatment on your own at home, make sure you have some Vaseline and a spoolie to prepare the brows and to brush them upwards while protecting your skin from staining with Vaseline. Aside from this, no other preparation is needed.
Related Posts
Related Search Topics (Ads)
Related Products
Eyebrow Tinting at a Salon
Step 1
A certified technician will protect your skin with a base cream, Vaseline or petroleum jelly. They will ask you to lay down and lay still on the table just for five minutes. Usually, this service will cost you around $10 to $20.
Step 2
They will use the semi-permanent dye which has been specifically made for your brows. They will not use any dyes that are used on hair, and neither should you. They will apply the dye to your brows with the spoolie brush. Some technicians may even mix two different shades to give you the perfect color and the shade that matches your skin tone perfectly.
Step 3
After the tint sets, they will brush it out. Two minutes later, they will glide their wet cotton pad across the brows to remove any excess color, and you will be good to go! Every technician will tell you not to use any oils or makeup on top of your brows for at least 12 hours after the treatment. Listen to their advice and you will love the outcome.
How to Tint Your Brows at Home
If you are doing brow tinting at home, make sure that you have purchased the right brow tinting kit. There are several different kinds on the market, but the right one will have some sort of a certification and will clearly state “brow tint” or “brow dye”, and not hair dye. If you want to save some time and money, and you feel capable of doing this on your own, here’s how to do it.
Step 1
Prepare for the process by removing makeup and adding Vaseline over your skin (wherever you do not want your tint to touch or stain you).
Step 2
Mix the tint that comes in the kit with its provided tools. Once you get an even mixture, use a brush that comes in the kit to apply the product.
Step 3
If there is no brush, use a brow spoolie. Coat the brow hairs in your paste starting at the root. Leave the product on for five minutes, or for 10 minutes if you want darker and more noticeable results.
Step 4
Use a cotton bud and tidy up the edges. Once everything dries, wipe off the brow with a clean tissue.
Related Posts
You can redo this process every other month in order to maintain the results.