Thinking about getting a new and unique manicure? How about you look into ombre nails?
Ombre nails have been a huge trend in the last two to three years, and they are something that every lady finds appealing! They are inspired by the popular ombre hair trend, where one color gradually fades into another. This can also look stunning once done the right way on top of your nails.
In most cases, a nail technician will apply a lighter color on top of the nail and will let it evenly and naturally blend into a darker shade at the beginning of your nail. Sounds interesting? Good, then keep on reading!
Related Posts


Who Should Get Ombre Nails?
Ombre nails are suitable for everyone! They can look very fun, casual, childish, but also professional and classy! It is all about finding the right color since every other shade is ideal for a different occasion.
Also, it is essential for you to find a fantastic nail expert, since not everyone is experienced in doing ombre nails.
Can You Do This At Home?
You definitely can, as long as you have all the right tools! Make sure you grab some spare time and remember that practice makes everything perfect!
Material wise, you’ll be needing:
- Nail clippers
- Acetone
- Cuticle pusher
- Clear base coat
- White nail polish
- Two or three different colored nail polishes
- Small sponge
- Top coat
What Nail Polishes Should You Choose for Ombre Nails?
You can go as creative and innovative as you want. A lot of women prefer OPI or Essie nail polishes since they are well made and long-lasting.
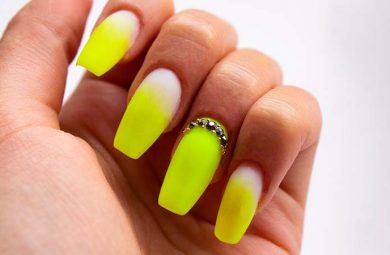
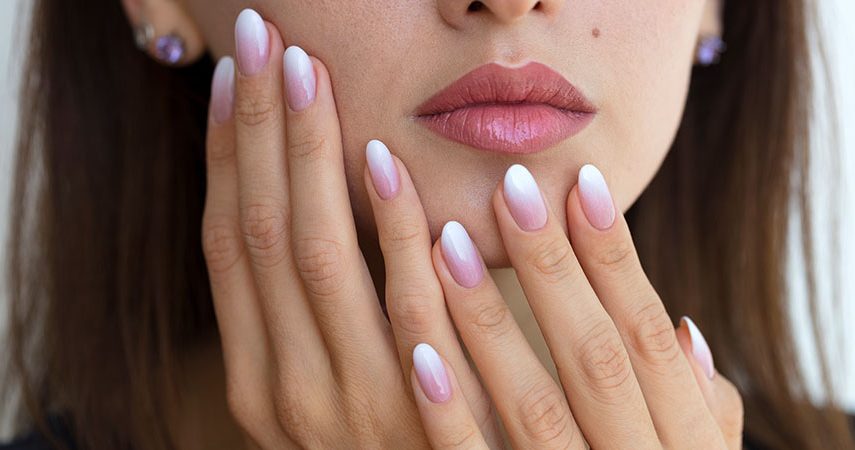
Color-wise, it is best to go with a white, pink, or light blue color tip, and then let it gradually fade into any darker color.
If you are someone who works and you need to make them business-friendly, try doing a three color mashup, consistent out of a white tip that will slowly fade into a light pink, and then into dark pink or violet. This manicure is very professional and formal looking, and is perfect for your business meetings!
If you want to add more colors, you can, but don’t stack more than 5 of them since they can end up looking messy, uneven, and not ombre.
How To Do Ombre Nails Step By Step
Looking to achieve the ombre nail style outside the nail salon? Here’s our step-by-step guide to help you accomplish this awesome nail art.
Related Posts
Related Search Topics (Ads)
Related Products
1. Clean Your Nails
Always make sure you are working with a clean base. Use a cotton ball and soak it in a nail polish remover and clean the surface of your nails. Also, take your nail clippers and get your nails to your desired, even, and equal length.
Make sure that every nail looks the same. Take a nail file and smooth out the edges and shape your nails in your wanted shape (coffin, square, oval), anything that suits you the best!
2. Push Back Your Cuticles
You can use a cuticle pusher or any smaller stick and push back your cuticles. This trick will make your nails appear longer, and it will look like you have more surface to work with. If you don’t own any of these tools, you can push them back with the thumbnails of your opposite hand.
3. Apply a Base Coat
Work with a clear base coat and apply it on all nails. This will serve you as a great base which can extend the lifetime of your manicure but will also will prevent any chips of your nail polish.
4. Choose Your Color
Choose your colored nail polish. Women mostly start off this part with white or any other lighter option. Paint two coats of your lightest colored nail polish on all of your nails at the top, but make sure that they are completely dry before moving further with other coats.
5. Use a Makeup Sponge
Apply other two of your chosen darker colors onto a makeup sponge, or any smaller sponge. Make sure that your lines are straight and placed one against the other, side by side. Make sure that your lines are not too thick since you will have to swipe them across your nail.
6. Apply Pressure
Related Posts
Make sure your first line on the sponge is lighter (towards the tip of your nail) and that the second one is darker since this way you will achieve that ombre effect. Apply pressure on top of your nail and always redo the polish application once your sponge becomes dry.
You can also dip the sponge in water before you start to paint and push these colors on top of your nails. This way the sponge won’t absorb too much of your polish but will absorb water. Just make sure that it is almost 80 percent dry before you press it on top.
7. Protect Your Fingers from Nail Polish
During this color application process, some polish will get caught onto your skin around the nails.
You can protect your skin and prevent this from happening by applying a thin layer of petroleum jelly or some duct tape around your nails. If not, use a q-tip dipped in acetone to clean them once everything is over.
8. Top Coat
Give your nails enough time to dry (around 15 minutes) and then proceed with a top coat. This will make your polish last longer, and your nails will look shiny and fresh!