Spring is here. Say goodbye to gloomy weather and welcome spring in its highest and prettiest form, filled with bright neon colors, flowers and pastels. All of these can make a different type of manicure. Are you intrigued by browsing through some fantastic nail art? If so, we will show you some amazing spring nail designs and we will teach you how to achieve every design by following some simple steps. Here are the top five spring nail designs which were inspired by the spring season!
Related Posts


Top 5 Spring Nail Designs
Here are five spring nail designs that are sure to get you in the mood for the spring season. Have fun with the intricate and simple designs and choose nail polish colors you love!
1. Spring Flowers
Floral nails are the most common go to at a salon during the spring season. These nails usually look the prettiest if decorated with bright dramatic stickers, or if done with petal-like drawings.
We recommend painting all of your nails in one lighter color and use it as a flat background. You should stick with white, pastel pink, or lilac. On top of these colors, use either floral stickers (which are pretty affordable if purchased online) or DIY your own flower petals.
If you are out of stickers, you can achieve floral-like designs by using a toothpick and drawing flowers and green petals, just take your time. Use darker colors on top of your canvas for a dramatic outcome. Use a fresh new toothpick before you dip into each new nail polish color.
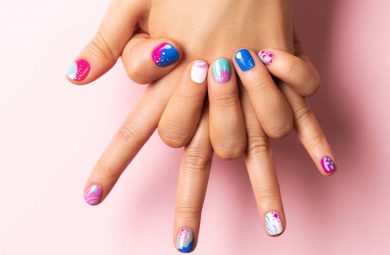
2. Marble Design
Marble inspired nails look aesthetically pleasing and very well thought out. If you love the marble design and bright, playful, unique nails, you will love this trend. Also, if you love your kitchen countertop, you will easily match it and you will look cohesive.
Use a base nail polish that will act as your marble surface. The best choice is black nail polish. Now, take a plastic wrap and scrunch it into a ball. Put a lighter color onto this wrap (white, pink) and press the ball and mix the colors together. Press the ball onto the nails and you will get a textured finish. Lastly, take a small detail brush and draw squiggly lines that will sporadically fall onto the nails. Use the same white and pink colors that you have previously applied and take your time.
Related Posts
Related Search Topics (Ads)
Related Products
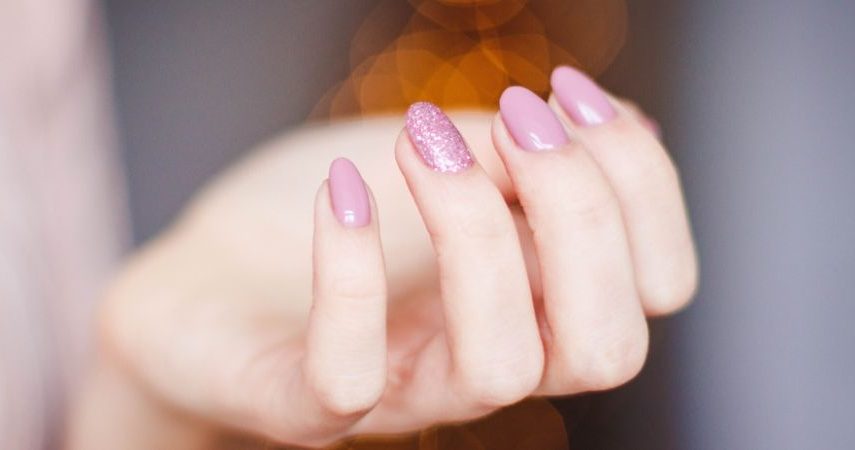
3. Pastel Party
Pastel shades are appropriate for any event as well as age group. This nail coloring technique will suit women who prefer color and who are all about embracing their fun and playful side.
This manicure is pretty simple and easy to achieve. A pastel manicure can be done per your preference and it is hard to mess it up. The real question is, how many pastel-colored nail polishes do you own? If you have 10 of them, why not color each of your nails into a different color and let them stand out in their own way? You can also do five of your fingernails in one pastel color and the other five in a contrast color, it is all up to you.
4. Polka Dots
Polka dots are an essential and a common statement by workaholic women, as well as those who love the polka dot statement trend. Polka dots were loved and worn 50 years back and are still to this day one of the prettiest patterns to rock.
You should paint a white base and apply two coats of this color. Once your base sets, use a round art brush and draw overlapping dots, one by one. You can stick to the typical black and white color combination (the classic polka dot), but we recommend placing some red, pink, as well as green dots onto your base. Go for playful and typical spring colors, and let your imagination go wild. Also, think of your makeup and the typical shadows and lipsticks that you wear on a daily. You can easily color match your polka dot manicure with your makeup, so why not go for it?
5. Brushstrokes
If you are a fan of finger painting (or if you ever were) you will love this manicure. It consists of playing with different brushstrokes techniques and textures, by using different matte and metallic nail polishes to get the ultimate eye-catching design.
Related Posts
Start out with a pretty base, such as a dramatic red or orange. Once your base is dry go in with different finishes on top. You should use different brushes to achieve different brush strokes. We recommend using a green, yellow, as well as pastel blue, to get the stunning wash of color. Place thick swirls and thin lines, and also add some shimmery glitter on top. If you have always loved reckless and out of the ordinary painting, this method is for you since there are no strict rules.