Many women have probably heard of nail stamps. They are a quick solution when doing a manicure if you are someone who is not that precise. If you are someone who does not have a steady hand then you are going to love nail stamps as they are a fun and easy solution that everyone can do. As you probably know it by now, learning new techniques and staying updated on every trend is hard since the beauty industry is so innovative. However, if you want to learn an in-depth process about how to use nail stamps then you are at a right place.
Related Posts


When to Get Them
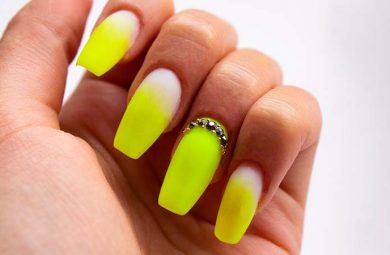
Many women prefer getting nail stamps for the summer season. They love having bright and bold prints since they believe they are the perfect accessory for the beach. The best part is that you can do them on your own since they don’t require any skills.
What You Need
You only need three tools: a stamping plate, a scraper, and a rubber stamper. These can be found anywhere from beauty supply shops, drugstores, and online.
Stamping plates are steel plates which, mostly, have some sort of an image on the plate. These images can be literally anything, starting from small flowers to fancy patterns.
Scrapers and stampers can come in different sizes as well as shapes. Some of them are more firm than then the others. You can use any type of nail polishes on your stamper except glitters since these can stick to your plate and ruin the design. Your best option is a metallic finishing polish which is not too thick or thin.
How to Use Nail Stamps
- Supplies: Besides the previously mentioned three items you will be needing a paper towel, some cotton balls, a polish remover, some scotch tape, and a top coat.
- Appliance: First off start with your base color. You can do any base you want, just make sure it is dry before you move onto the next step. Apply two sets of your top coat. This will speed up the process.
- Place the Plate: Take your stamp plate and apply your chosen nail polish all over it. With a help of the scraper, immediately scrape over the nail polish since you need to remove the excess. If you do it right you will notice that the wet polish has filled the grooves of your design and that your plates surface is clean.
- Lift it: In order to successfully lift the image from your stamping plate take the stamper and roll it across your design. Make sure you do it in only one smooth movement. Practice makes everything perfect, so it is completely normal if you don’t get it perfect after your first try. Use firm movements, but don’t apply too much of pressure since the nail polish will groove and end up looking messy. Also, make sure you don’t lift up or move the stamper.
- Position it: Take your stamper and position it over your nail so that the design is just where you want it to be. Use one firm and smooth movement and press the stamp on the nail. Make sure you are working quick but steady when pressing the design down since you don’t want your polish to dry. Apply your design by moving the stamper to the left and right across the nail. After you are done make sure that your stamper is clean and that it doesn’t have any dried nail polish. Wipe it with a clean paper towel and then move onto the next nail.
- Tape: With the sticky side of your tape remove any residue from the stamper. You can also use the tape to remove any unwanted nail polish residue on your fingers and nails.
- Top Coat: After you are done with all of your nails use a top coat. Make sure your masterpiece is already dried down so that you can apply your final layer. Only one coat will do, just make sure you don’t ruin your design.
- Q tip: Use a Q tip and a polish remover to remove any unwanted polish residue around your nails and fingers.
Related Posts
Related Search Topics (Ads)
Related Products
What If You Make a Mistake
Mistakes happen to all of us, especially rookies. You shouldn’t be alarmed if you don’t get it perfect after your first attempt. Smeared polishes and crooked patterns can be annoying and you should redo everything starting from scratch if you are not satisfied.
Most Common Mistakes
When doing your nail stamps women do make some errors. Here are the top five mistakes that you should avoid:
Related Posts
- Remove the plastic: Some of the plates have got an aluminum foil over the plate, or some other type, which you will need to remove before you start with the whole process. This sounds like a funny error, but it is an often rookie mistake.
- Work fast: Don’t let your polish dry down on the stamper. Work fast and precise if you want to see the results.
- Don’t use sheer polishes: Use vibrant and bright nail polishes if you want your image to pop and to show.
- Watch out for polishes: Never use nail polishes that are expired, nor matte polishes. These won’t look right and will dry out before you even get the chance to work with them.